
后台管理系统-前端Vue项目搭建
后台管理系统,前端项目的第一步,项目创建。
·
后台管理系统简介
从本章节开始我们将逐渐完成一套后台管理系统的搭建过程。
前端技术 Vue3.2 , 后端搭建使用Spring Cloud Alibaba。
1、Vue项目初始化
我们使用Vue ui 来初始化项目。
1.1 使用vue ui创建项目
在git bash命令行工具中,输入 vue ui 命令
vue ui
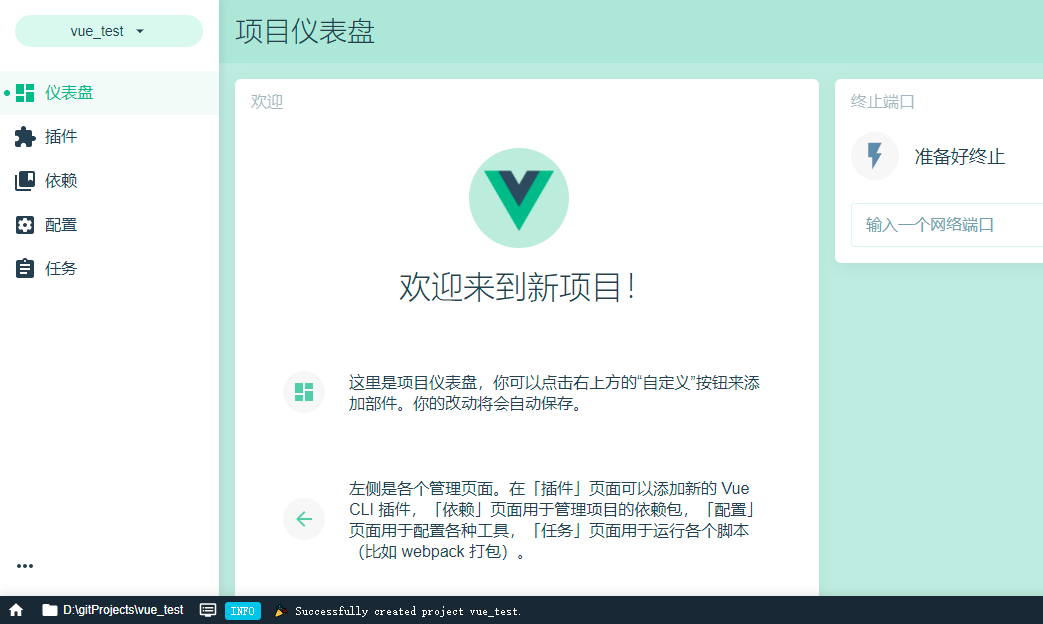
启动 vue内置的项目创建服务,访问
http://localhost:8000/dashboard
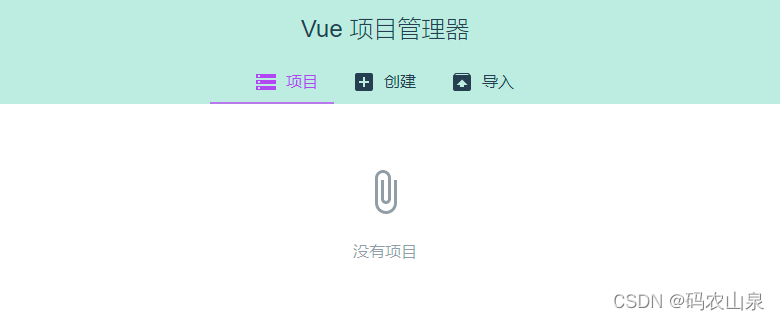
进入 Vue 项目管理器
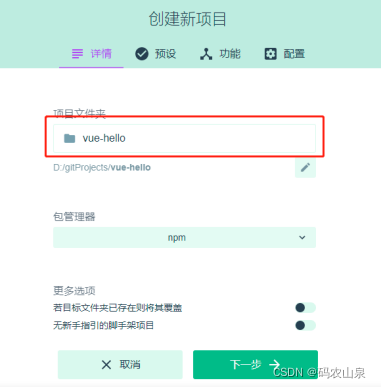
1.2 新建项目
1、录入项目名称
2、选择项目存放位置
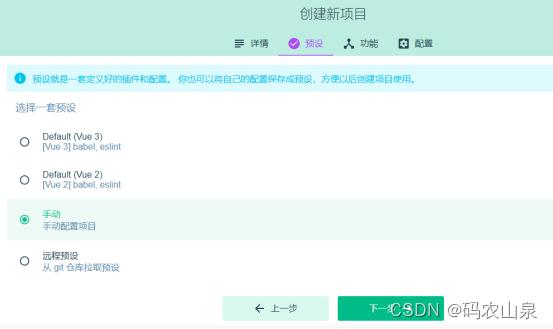
1.3 选择项目预设
使用手动方式创建项目
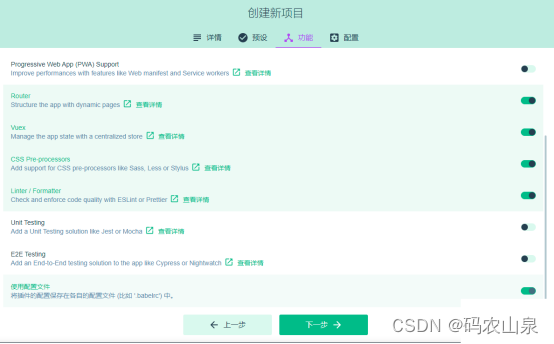
1.4 选择使用的功能
在这里我们选择 Babel、Router、Vuex、CSS、Linter Formatter、使用配置文件
1.5 选择项目配置
VueJs版本选择 3.x
Sass/SCSS
ESLint + Standard config
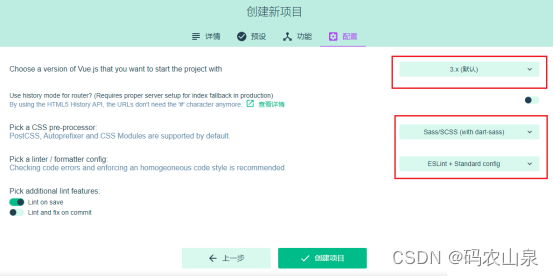
点击创建项目,完成Vue3.2项目创建。
1.6 运行项目
1、使用 npm install 安装包依赖
2、使用 npm run serve 启动项目
PS D:\VueProjects\vue-hello> npm install

up to date in 3s
PS D:\VueProjects\vue-hello>
PS D:\VueProjects\vue-hello> npm run serve

> vue-hello@0.1.0 serve
> vue-cli-service serve

 INFO  Starting development server...


 DONE  Compiled successfully in 14704ms                                                                                                     16:26:02


  App running at:
  - Local:   http://localhost:8080/
  - Network: http://172.20.10.2:8080/

  Note that the development build is not optimized.
  To create a production build, run npm run build.
2:引入代码格式化
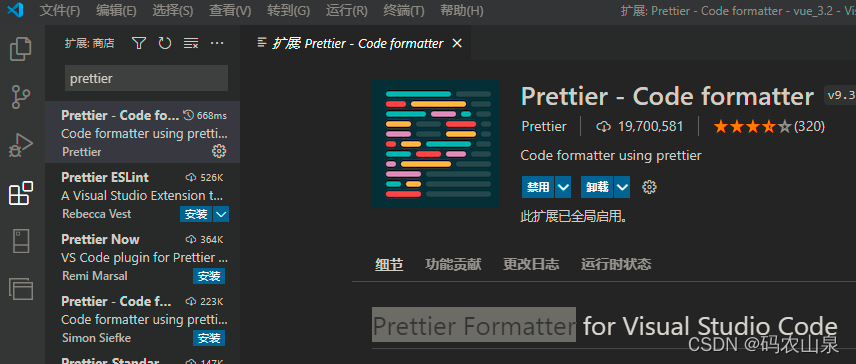
我们为VsCode安装代码格式化插件Prettier Formatter。
2.1 安装插件Prettier Formatter
2.2 格式化配置文件.prettierrc
- 在项目根目录新建格式化配置文件.prettierrc
- 文件内容:
{
  "semi": false,
  "singleQuote": true,
  "trailingComma": "none",
  "printWidth": 160,
  "bracketSpacing": true
}
| 配置项 | 作用 |
|---|---|
| semi | 是否使用分号结尾 |
| singleQuote | 是否使用单引号 |
| trailingComma | 是否使用分号结尾 |
| printWidth | 每行最多多少个字符换行 |
| bracketSpacing | 对象中的空格 true: { foo: bar } |
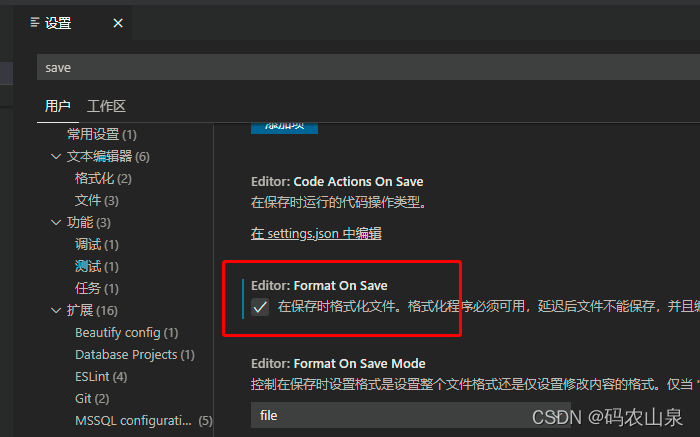
2.3 设置文件保存后自动格式化
在“文件”-“首选项”-“设置” 中勾选 Format On Save
解决 prettier和ESLint的冲突
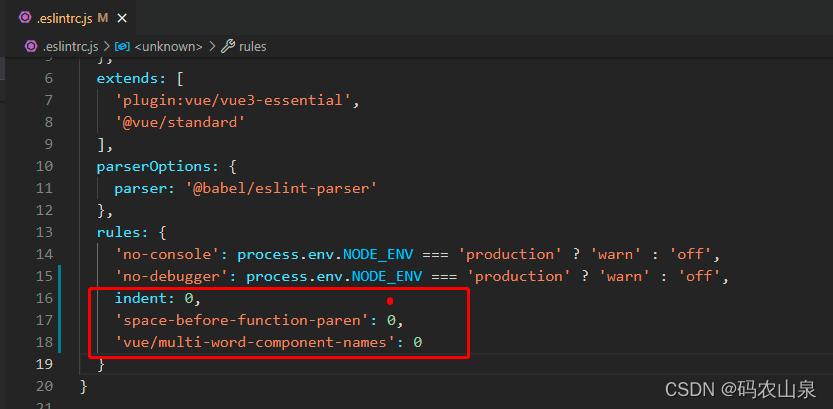 在配置下.eslintrc.js里的rules 新增 ,取消几项eslint代码检查
'indent': 0,
'space-before-function-paren': 0
'vue/multi-word-component-names': 0
| 规则 | |
|---|---|
| indent | 文本缩进 |
| space-before-function-paren | 定义函数时前面要不要空格 |
| vue/multi-word-component-names | Component命名规范不能为单个词 |
3:按需导入element plus
3.1 安装element plus
$ npm install element-plus --save
3.2 安装按需导入插件
根据ElementUI 官网中的描述
自动导入:
首先你需要安装unplugin-vue-components 和 unplugin-auto-import这两款插件:
npm install -D unplugin-vue-components unplugin-auto-import
3.3 配置按需自动导入
修改配置文件 vue.config.js
const AutoImport = require('unplugin-auto-import/webpack')
const Components = require('unplugin-vue-components/webpack')
const { ElementPlusResolver } = require('unplugin-vue-components/resolvers')

module.exports = {
  configureWebpack: config => {
    config.plugins.push(AutoImport({
      resolvers: [ElementPlusResolver()]
    }))
    config.plugins.push(Components({
      resolvers: [ElementPlusResolver()]
    }))
  }
}
配置完成后,我们可以在我们vue文件中使用 elementui组件了。
3.4 测试使用elementui
修改About.vue
<template>
  <div class="about">
    <el-button type="primary">测试</el-button>
  </div>
</template>
访问页面,查看效果:
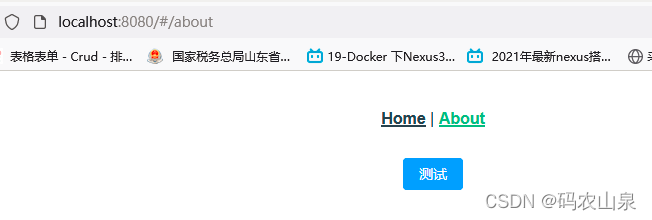

基于 Vue 的企业级 UI 组件库和中后台系统解决方案,为数万开发者服务。
更多推荐
 1
1 0
0- 0


 已为社区贡献1条内容

所有评论(0)