
Vue中路由实现后台管理系统
案例实现准备引入vue-router与vue编写样式实现HTML编写创建组件1、创建后台管理系统组件2、创建用户管理区域组件2.1、 创建二级详情页面组件3、 创建权限管理组件4、创建商品管理组件5、创建订单管理组件6、 创建系统设置组件创建路由对象并且进行挂载效果图图1图2(详情页)准备引入vue-router与vue必不可少:安装好vue-router引入vue-router和vue编写样式h
·
案例实现
准备
引入vue-router与vue
编写样式
html,
        body,
        #app {
          margin: 0;
          padding: 0px;
          height: 100%;
        }
        .header {
          height: 50px;
          background-color: #545c64;
          line-height: 50px;
          text-align: center;
          font-size: 24px;
          color: #fff;
        }
        .footer {
          height: 40px;
          line-height: 40px;
          background-color: #888;
          position: absolute;
          bottom: 0;
          width: 100%;
          text-align: center;
          color: #fff;
        }
        .main {
          display: flex;
          position: absolute;
          top: 50px;
          bottom: 40px;
          width: 100%;
        }
        .content {
          flex: 1;
          text-align: center;
          height: 100%;
        }
        .left {
          flex: 0 0 20%;
          background-color: #545c64;
        }
        .left a {
          color: white;
          text-decoration: none;
        }
        .right {
          margin: 5px;
        }
        .btns {
          width: 100%;
          height: 35px;
          line-height: 35px;
          background-color: #f5f5f5;
          text-align: left;
          padding-left: 10px;
          box-sizing: border-box;
        }
        button {
          height: 30px;
          background-color: #ecf5ff;
          border: 1px solid lightskyblue;
          font-size: 12px;
          padding: 0 20px;
        }
        .main-content {
          margin-top: 10px;
        }
        ul {
          margin: 0;
          padding: 0;
          list-style: none;
        }
        ul li {
          height: 45px;
          line-height: 45px;
          background-color: #a0a0a0;
          color: #fff;
          cursor: pointer;
          border-bottom: 1px solid #fff;
        }

        table {
          width: 100%;
          border-collapse: collapse;
        }

        td,
        th {
          border: 1px solid #eee;
          line-height: 35px;
          font-size: 12px;
        }

        th {
          background-color: #ddd;
        }
实现
HTML编写
<div id="app">
      <router-view></router-view>
</div>
创建组件
1、创建后台管理系统组件
 var app={
      template:
      `
      <div>
            <!-- 头部区域 -->
            <header class="header">后台管理系统</header>
            <!-- 中间主体区域 -->
            <div class="main">
              <!-- 左侧菜单栏 -->
              <div class="content left">
                <ul>
                  <li><router-link to="/users">用户管理</router-link></li>
                  <li><router-link to="/rights">权限管理</router-link></li>
                  <li><router-link to="/goods">商品管理</router-link></li>
                  <li><router-link to="/orders">订单管理</router-link></li>
                  <li><router-link to="/settings">系统设置</router-link></li>
                </ul>
              </div>
              <!-- 右侧内容区域 -->
              <div class="content right">
                <div class="main-content">
                <router-view />
                </div>
              </div>
            </div>
            </div>
            <!-- 尾部区域 -->
            <footer class="footer">版权信息</footer>
          </div>
        <!-- 路由占位符 -->
        <router-view></router-view>
      `
    }
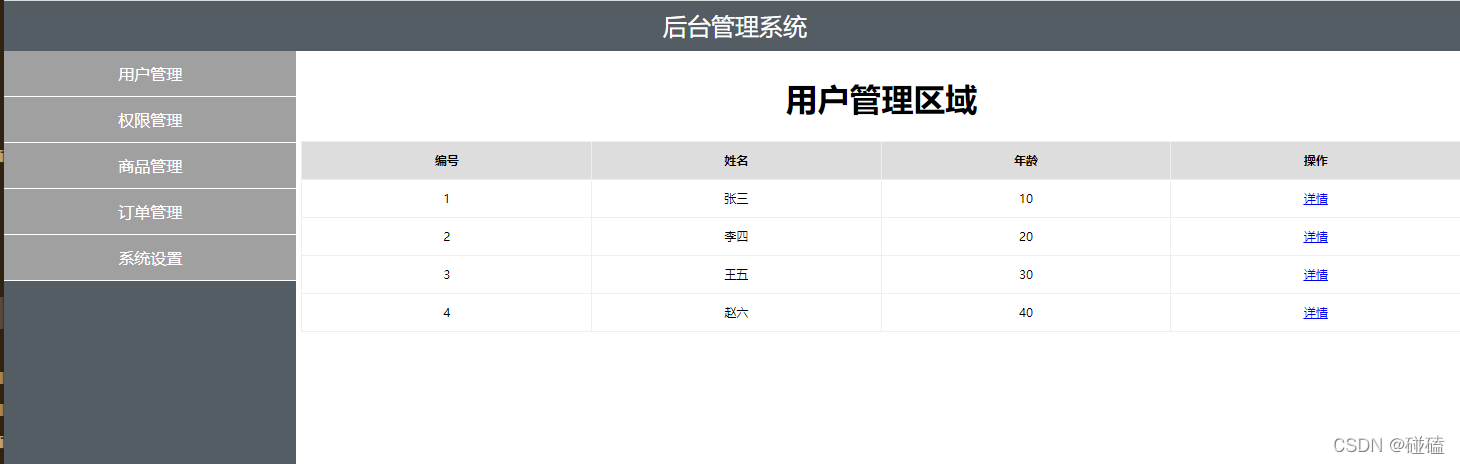
2、创建用户管理区域组件
数据是固定的,用于测试
var users={
        data:function(){
            return{
                users:[
                    {id:1,uname:'张三',age:10,cz:'详情'},
                    {id:2,uname:'李四',age:20,cz:'详情'},
                    {id:3,uname:'王五',age:30,cz:'详情'},
                    {id:4,uname:'赵六',age:40,cz:'详情'}
                ]
            }
        },
        template:`
        <div>
            <h1>用户管理区域</h1>
            <table>
                <tr>
                    <th>编号</th>
                    <th>姓名</th>
                    <th>年龄</th>
                    <th>操作</th>
                </tr>
                <tr v-for="item in users" :key="item.id">
                    <td>{{item.id}}</td>
                    <td>{{item.uname}}</td>
                    <td>{{item.age}}</td>
                    <td><router-link :to="/msg/+item.id"><a href="#">{{item.cz}}</a></router-link></td>
                </tr>
            </table>
        </div>
        `
    }
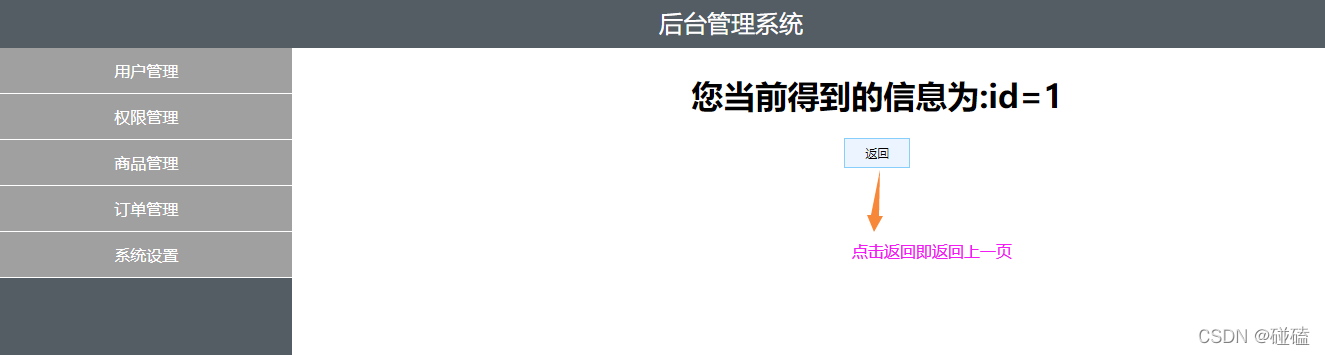
2.1、 创建二级详情页面组件
var msg={
        template:
        `
        <div>
        <h1>您当前得到的信息为:id={{$route.params.id}}</h1>
        <button οnclick="javascript:history.go(-1)">返回</button>
        </div>
        `
    }
3、 创建权限管理组件
 var qx={
        template:
        `
        <h1>权限管理</h1>
        `
    }
4、创建商品管理组件
var goods={
        template:
        `
        <h1>商品管理</h1>
        `
    }
5、创建订单管理组件
 var orders={
        template:
        `
        <h1>订单管理</h1>
        `
    }
6、 创建系统设置组件
 var settings={
        template:
        `
        <h1>系统设置</h1>
        `
    }
以上组件可根据自己的需求更改
创建路由对象并且进行挂载
var router=new VueRouter({
        routes:[
            {path:'/',component:app,children:[

            {path:'/',redirect:'/users'},   //redirect重定向
            {path:'/users',component:users},
            {path:'/rights',component:qx},
            {path:'/goods',component:goods},
            {path:'/orders',component:orders},
            {path:'/settings',component:settings},
            {path:'/msg/:id',component:msg}
            ]}

        ]
    });

    var vm=new Vue({
        el:"#app",
        router:router
    })
效果图
图1
图2(详情页)
成功实现~

基于 Vue 的企业级 UI 组件库和中后台系统解决方案,为数万开发者服务。
更多推荐
 5
5 0
0- 0


 已为社区贡献1条内容

所有评论(0)